Rainy Day Activities
Trapped inside with your children while it rains outside? Here in Gainesville we see our fair share of rainy days. Instead of plopping your child in front of the tv watching Disney all day long, how about engaging in some fun, creative activities? Use this section to access excellent things to do with your child when going outside is not an option. GREAT for sick days, too!

3 Foliage Inspired Craft Ideas:
Crafting is an engaging way to occupy a child’s attention while encouraging their imagination, ability to follow instructions, and emotional and mental development. Not to mention, crafting provides you an opportunity to have fun and quality time with your child on their level.
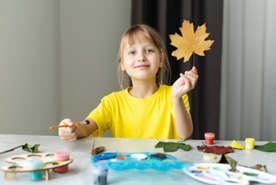
We put together 3 foliage inspired craft ideas that will engage your child and give them an opportunity to engage with nature.
Leaf & Flower Peacock Craft
Nature is full of abundant pieces that you and your child can use for craft making.
Task: You and your child will make pictures of peacocks and use leaves and flowers to decorate the bird’s feathers. Googly eyes will be placed on the animals to make them come to life.
Supplies:
- Paper
- Markers
- Googly eyes
- Glue
- Leaves
- Flowers (optional)
- Protective Mat or Newspaper
Instructions:
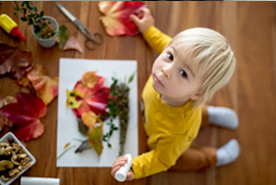
Step 1) With your child, gather leaves and flowers from outside. You will want to collect foliage that will represent feathers of the peacock that you will create in following steps.
Step 2) Cover your craft space with a mat or newspaper to prevent damaging your workspace from craft supplies. Choose a workspace that is at a height where you and your child can contribute to the craft.
Step 3) Place your paper on the prepared workspace.
Step 4) With markers, draw the torso of the peacock on the paper using a simple shape. Any simple shape can work, so ask your child their favorite shape and use it for the body of the peacock.
Step 5) Color in the simple shape you and your child drew on the piece of paper.
Step 6) Glue the collected leaves and flowers around the upper half of the drawn simple shape. The leaves and flowers represent the tail feathers of the peacock.
Step 7) Glue 2 googly eyes in the center of the drawn shape to bring the peacock to life.
Step 7) Wait for the glue to dry.
Step 8) Clean your craft space thoroughly
Step 9) Hang your craft somewhere for your household to appreciate.
Leaf Painting
Nature provides you with leaves that make beautiful stamps.
Task: You and your child will create a unique pattern using leaves as stamps.
Supplies:
- Paper
- Poster Paint
- Paint palette or disposable cups
- Paint Brushes
- Leaves
- Protected Mat or Newspaper
Instructions:
Step 1) With your child, gather leaves from outside. You will want to collect foliage that will make a good stamp. Look for items with prominent features such as ridges or grooves.
Step 2) Cover your craft space with a mat or newspaper to prevent damaging your workspace from craft supplies. Choose a workspace that is at a height where you and your child can contribute to the craft.
Step 3) Place your paper on the prepared workspace.
Step 4) Place a leaf on the workspace with the stem facing up.
Step 5) Poor paint on paint palette or in disposable cups.
Step 6) With a paint brush with paint, paint over the leaf with your child’s favorite paint colors.
Step 7) Pick up the painted leaf and stamp the painted side on a blank sheet of paper
Step 8) Repeat process for desired results. Consider using different kinds of leaves and paint colors for each stamp.
Step 9) Let the paint dry.
Step 10) Clean your craft space and paint brushes thoroughly.
Step 11) Hang your craft somewhere for your household to appreciate.
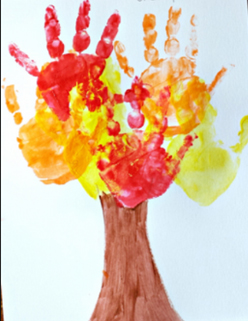
Seasonal Handprint Trees
Nature can inspire you and your child to create beautiful works of art. This option does not require you to go outside and is perfect for a rainy-day activity.
Task: You will create a craft of with 4 trees with your hands and arms. Each tree will depict 1 of the different 4 seasons.
Supplies:
- Paper
- Markers
- Poster Paint
- Paint palette or disposable cups
- Hands
- Protective Mat or Newspaper
Instructions:
Step 1) Cover your craft space with a mat or newspaper to prevent damaging your workspace from craft supplies. Choose a workspace that is at a height where you and your child can contribute to the craft.
Step 2) Place your paper on the prepared workspace.
Step 3) Lay your child’s hand and arm near the left edge of the piece of paper.
Step 4) Trace their hand and arm with a marker. It is likely you will need to help them trace their hand and arms.
Step 5) Repeat the process until there are 4 traces of your child’s hand and arm from left to right. These traces will represent 4 tree trunks.
Step 6) Color the traces with brown marker.
Step 7) Poor paint colors on paint palette or in disposable cups.
Step 8) Dip your child’s fingers and your fingers in the paint and use fingerprints to add leaves to the drawn tree trunks. Be sure to decorate each tree according to each season of the year.
Step 9) Wash your hands.
Step 10) Let the paint dry.
Step 11) Clean your craft space thoroughly.
Step 12) Hang your craft somewhere for your household to appreciate.


